Breathing Life into Game Graphics with Physics in Phaser
Craft ropes that dance, limbs that sway, and fish that splash with the magic of physics and images in Phaser. Learn how to effortlessly create a rope-like mesh from an image, connecting it with physics boxes to infuse your game graphics with captivating animation and character.
Updated: Nov 22, 2023
Published: Nov 22, 2023
Breathing Life into Game Graphics: A Guide to Animated Mesh Distortion with Phaser
As I was playing a handful of entries for yet another game jam, I found myself impressed with this game about dead fish mixed with pinball. Despite being dead, the fish looked so lifelike, but I had no idea how it was possible. I asked the developer how he did it.
Intriguingly, he explained,
"The fishes are 5 different sized circles connected by revolution joints with a set limit. I used the PixiJS Rope Mesh to draw the fish graphic along the bones (Ref gamedevjs-2022 game jam)."
This sounded too difficult, so I didn't even try to create it. Then, 2 years later, the itch to understand it lingered, and I decided to give it a try myself.
In this blog post, I'll take you on the same journey that started with a simple question during a game jam and led to the exploration of animated mesh distortion with Phaser.
We'll learn a simple yet powerful technique to add animation to our game graphics. We'll be using Phaser and MatterJs (the physics engine bundled with Phaser) to achieve this.
Before we dive into the implementation, it's a good idea to understand 2 main topics:
- Mesh (image) distortion
- Physics and constraints
It will be easier to go through the implementation when we understand the concept of these two topics.
I won't cover all the nitty gritty details and low level implementation. Rather, give an easy to understand explanation, and how we can effectively use them.
Mesh distortion
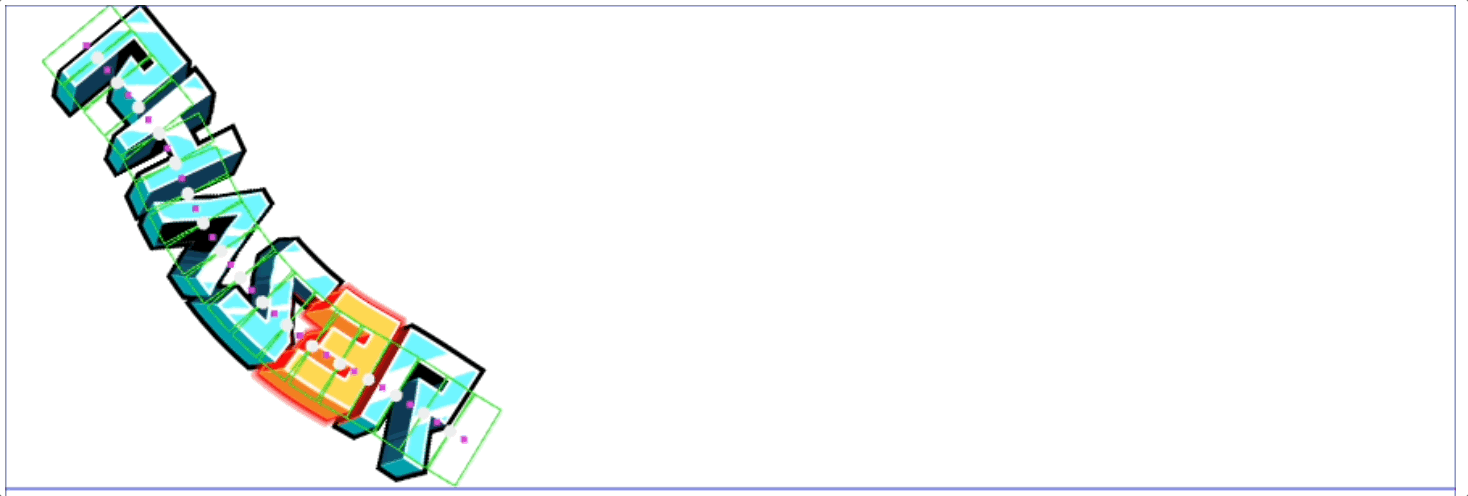
A mesh is essentially an image, but we separate the image into sections, with each segment controlling a portion of the image. The mesh is connected with triangles (or quads), each with its set of coordinates. This may sound more confusing than it is, and the following image can help clarify what I mean.

I've separated the image into 4 different regions (with 10 control points.) This is our mesh. When we move the control points, the image will be distorted, and change it's shape. This is mesh distortion in action.
It may be easier to understand if you've worked with photo editing tools, such as Photo Shop or Affinity Photo. The tools have filters to distort the image, e.g. "Perspective" or "Mesh Warp". The principle is the same. We adjust the mesh to shape the image. I used Affinity Photo for the above image.
Mesh distortion is useful because you can have 1 image and use it for animations. By manipulating the mesh, you can simulate natural movements, deformations, and reactions to different forces, providing a more lifelike appearance to objects or characters.
Physics and constraints
In Phaser, we have a physics engine. The default is called "Arcade," and the second is called "matter," (or "MatterJS".) We'll be using "matter" in this blog post. With this engine, we can create several boxes and connect them together using constraints. A constraint is a rule that tell how objects are connected together.
We don't have to care about the implementation details of this, we just need to know how to use them. That's the beauty of a physics engine. All the difficult calculations and collisions are handled for us.
Here's an example of how we can connect two boxes together
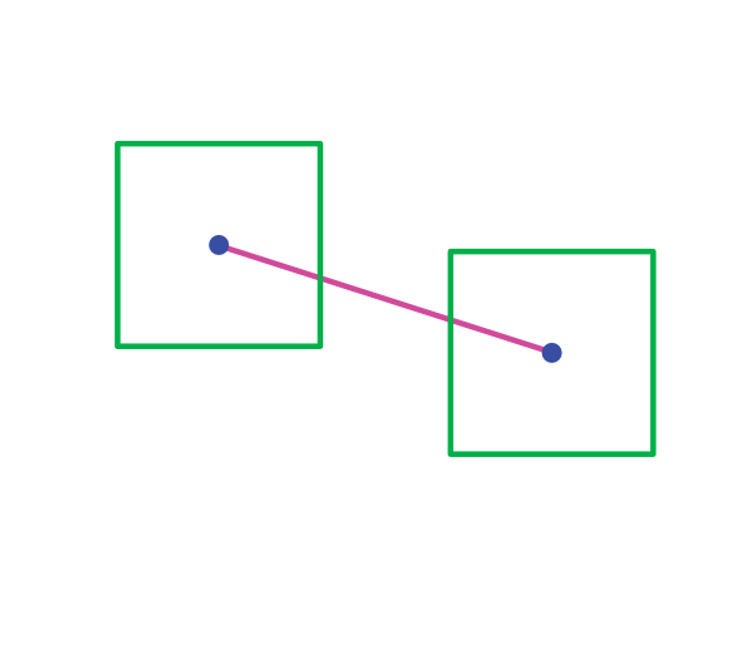
The pink line between the boxes is a constraint. The constraint can have spring-like qualities, or be stiff as a bone. The physics engine will make sure to follow the rules, keeping the boxes connected while respecting the other rules of physics, such as gravity and collisions.
Connect the mesh to the boxes
Once we understand how we can manipulate an image with a mesh, and connect boxes together, we'll be able to create something with life. Phaser has some convenient functions to make this easier for us, but before we dive into the implementation, let me quickly go through what we will do.
- Create a rope mesh with Phaser
- Create physics boxes and connect them
- Each box is responsible to distort portions of the image
- Update the rope mesh to align with the boxes

All we've done is connecting the mesh to the boxes. Phaser handles everything else for us. If we drag the boxes around, the image changes too.
The implementation
The complete code example is available on CodePen, and can also be found at the end of this blog post. I'll go through each part in this blog post. Feel free to send me a message through my contact form if you have questions or just want to chat. You can also find me on Twitter (𝕏) @ReitGames.
Creating the mesh
Phaser has a built in Rope function we can use to create the mesh for us. The rope will help us distort the image correctly.
createRope.js
  // Use Phaser's built in Rope to create a mesh from the image.
  createRope() {
    this.rope = this.add.rope(0, 0, "example");
    this.rope.setPoints(40); // a number that indicates how many segments to split the texture frame into.
  }
Creating the physics
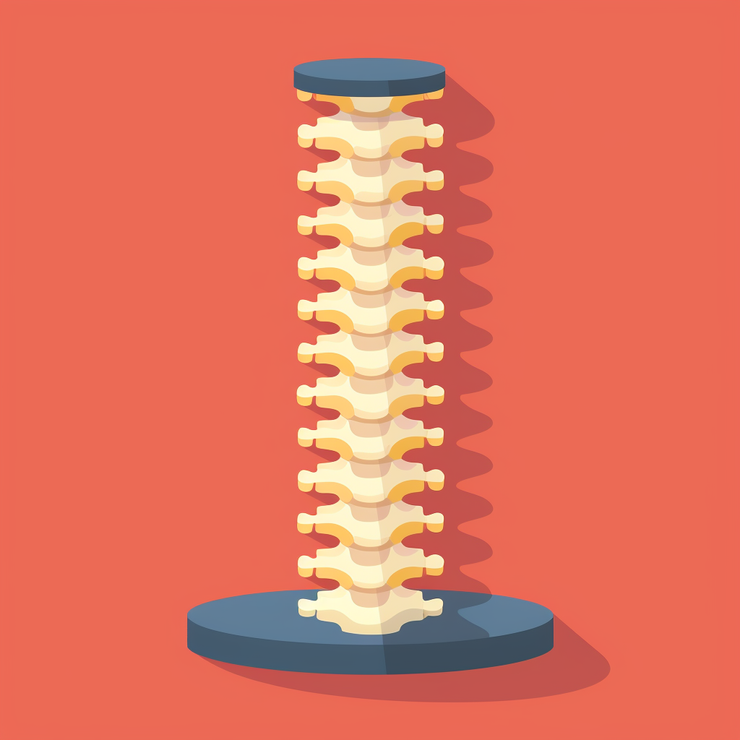
We'll create boxes, and connect them together. For this example, I like to think of each box as a bone. Each bone is connected together which will create a skeleton, similar to a spine.
Create two functions:
- createSkeleton, which creates a list of bones
- createSpine, which connects the bones together using constraints
createSkeleton.js
// Create the physics boxes
createSkeleton() {
  this.skeleton = []; // global variable. We'll use it in another function

  // Create the bones, our physics boxes.
  for (let i = 0; i < 18; i++) {
    const bone = this.matter.add.rectangle(180, 150, 20, 55, {
      friction: 1,
      restitution: 0.06
    });
    this.skeleton.push(bone);
  }
}

// Connect the bones to form our skeleton (spine)
createSpine() {
  const spinePoints = [];
  // Connect each bone with a constraint to create a spine
  // Think of the spine as the curve that goes through the center of each box
  for (let i = 0; i < this.skeleton.length - 1; i++) {
    const boneA = this.skeleton[i];
    const boneB = this.skeleton[i + 1];
    // the points are used to offset the connection betweem the boxes
    const pointA = { x: 10, y: 0 };
    const pointB = { x: -10, y: 0 };
    this.matter.add.constraint(boneA, boneB, 0.1, 1, {
      pointA,
      pointB
    });
    spinePoints.push(...[0, 0]);
  }
  // Creates a smooth line that goes through the center of our bones.
  // A spline will create a smooth curve between each point.
  this.spineCurve = new Phaser.Curves.Spline([0, 0, ...spinePoints]);
}